STATUS | Owner's Manual
Program Copy Mode and MIDI Dump
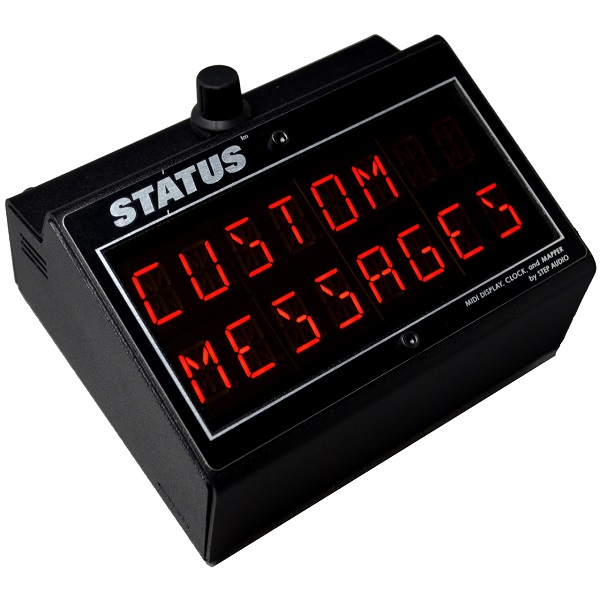
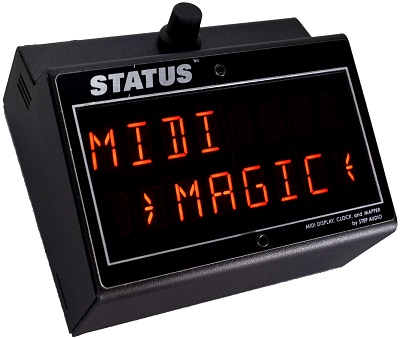
MIDI Receive ChannelSTATUS™ is a powerful, yet simple-to-use MIDI Display that features 16 Large Bright Red Alphanumeric LEDs.
STATUS is also a programmable MIDI Clock Generator that adds MIDI Clock to an existing stream of MIDI data, or works as a stand-alone device.
STATUS is also a MIDI Mapper and Filter that responds to MIDI Program Changes by sending out up to 5 different Program Changes as well as 16 Control Change or Note On messages all on separate MIDI Channels. STATUS can also actively filter various types of incoming MIDI data, dynamically re-map two separate controllers, and rectify running status data.
STATUS is also a programmable PedalBoard Synchronized CC Tempo Controller for Line 6 and Behringer Devices, T-Rex’s Replica Delay, and Free The Tone’s Flight Time Delay.
STATUS works with any MIDI controller.
STATUS must be on the same MIDI channel as your controller. The default MIDI Channel for STATUS is 15. This can be changed from the Globals Menu. Be certain your MIDI controller is sending on Channel 15 or switch STATUS to the channel that your controller is using.
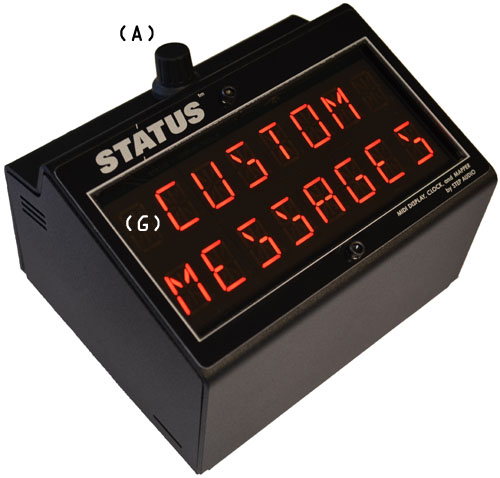
The Knob/Button on top of STATUS is used to access and control various functions. It can be turned and pressed. When editing program names and during MIDI Map Mode, the knob can be simultaneously pressed and turned to quickly advance through letters or settings.
Connect a standard 5-pin MIDI cable between the device sending MIDI messages and the MIDI IN Jack on STATUS.
When a Program Change is received on the correct MIDI Channel, STATUS displays the stored message and sends the MIDI Mapped data.
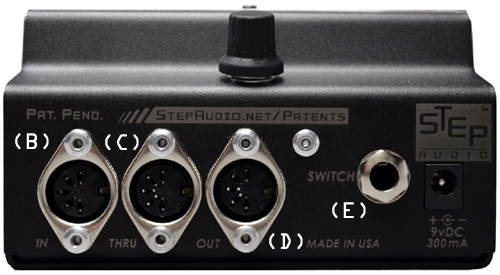
Connect a 5-pin MIDI cable between the MIDI THRU Jack on STATUS and your compatible device.
The MIDI THRU Jack repeats MIDI messages received at the MIDI IN Jack, unchanged, and regardless of the MIDI Channel. No additional data is added by STATUS.
Connect a 5-pin MIDI cable from the MIDI OUT Jack to the MIDI IN Jack on your compatible device.
Note: If you are using more than one STATUS in your rig, send data downstream using the THRU jack rather than the OUT jack.
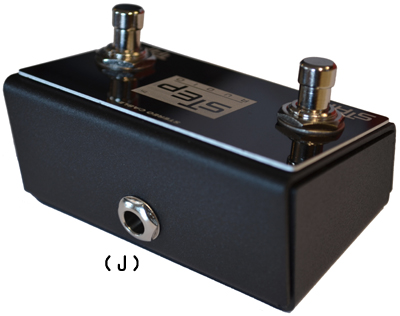
Connect the optional Start/Tap Switch to the “SWITCH” jack on STATUS via a ¼ inch stereo cable (included with switch).
Connect a separate or isolated 9 volt, 2.1mm, 300mA minimum, tip negative DC Power supply into the 9vDC Power Jack (F).
Never power STATUS using a "daisy chained" power supply that is also connected to audio effects or you may hear noise.
The STATUS Display features 16 Large Bright Red LEDs which use letters and numbers to show custom messages, tempo in Beats Per Minute (BPM), and MIDI data, as well as providing a programming interface.
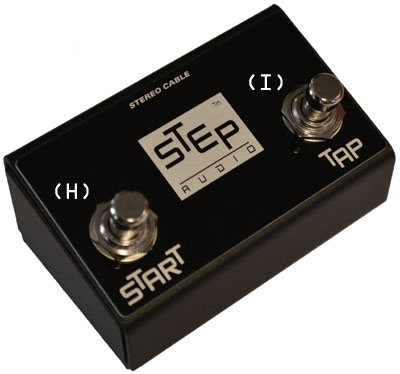
The Internal MIDI Clock can be controlled using an optional Side Controller. The START Button (H) starts and stops the clock, while the TAP Button (I) controls the tempo (based on the Tap Ratio for the current program).
STATUS can enhance an existing MIDI system that sends Program Change messages. Examples include MIDI controllers like the BOSS ES-8, Boss ES-5, GigRig G2, Tech 21 MIDI Mouse, Behringer FCB-1010, and any DAW system, to name only a few.
When STATUS receives a MIDI Program Change message on its MIDI Receive Channel, it responds in a number of ways:
1) The Display shows the custom MIDI message you have created for that program
2) MIDI Clock is either started at a stored tempo, stopped, or external MIDI clock is passed through.
3) Up to 5 additional MIDI Program Change messages and up to 16 MIDI Control Change and/or Note On messages are sent to downstream effects.
If selected, Tap CC (control change) messages are also sent in time with MIDI Clock to devices that synchronize using that method, including most Line 6 MIDI-enabled pedals.
STATUS also responds to a number of MIDI Control Change messages and can dynamically re-map 2 incoming controllers separately for each preset.
Note: STATUS will ignore Program Changes that are not on its MIDI Receive Channel.
STATUS uses five (5) main screens:
When STATUS is first turned on, it displays a title screen, then says Program Name Display for a second before jumping to the first program name. A different startup screen can be selected in the Globals Menu.
Turn the Knob to switch between modes. Press the Knob to access additional functions (as described below).
Note: You can also switch between Display Modes by sending STATUS Control Change (CC) 89 on its MIDI Receive Channel using these values:
1 = Progam Name Display
2 = BPM Display
3 = Tempo Superflash
4 = Data Display | SYS MSG
STATUS Display Modes
When Program Name Display Mode is selected, the message “PGM NAME DISPLAY” will briefly appear, then the stored program name for the current program will be displayed. Program names are customized as described below.
A MIDI Program Change received on the MIDI Receive Channel will recall the stored program name for the incoming program number.
Note: While in Program Name Display Mode, quickly pressing the Knob momentarily displays the current program number.
“INTERNAL CLOCK” or” EXTERNAL CLOCK” will appear, depending on the clock source for the current program, when STATUS is in Tempo Display Mode.
Press the Knob to switch to BPM display mode.
STATUS features four clock modes:
External
Internal Auto-Start
Internal Manual Start
Internal, Last Tempo
Clock modes are chosen during the MIDI Map Mode or using the online programmer.
MIDI Clock Controls Explained
Upon receipt of a MIDI Program Change message, if the MIDI Clock Source for that program is set for EXTERNAL, any incoming external MIDI Clock data is passed through to your downstream devices.
When the current program uses External Clock Mode, the display shows “EXT CLCK”, on the top row and an asterisk between those words flashes in time with quarter notes.
The bottom row shows the current Beats Per Minute (BPM)in the format “xxx.x BPM”. If no External clock is being received, the bottom row shows “---.- BPM”
If an external MIDI clock is being received, pressing the Knob advances to Superflash mode, where all LED segments flash in time with quarter notes. Pressing the Knob again, returns to BPM display mode.
Turning the Knob at this screen advances STATUS to the next Display Mode.
Note: If external MIDI clock stops while in Superflash mode, STATUS returns to BPM display mode.
Note: While in External Clock Mode, STATUS passes MIDI Start, Stop, and Continue messages to your downstream devices.
Note: Selecting an Internal clock modes blocks any External MIDI Clock.
Tip: To block all MIDI Clock, select INT-MAN. Any Internal clock will stop when STATUS switches to an INT-MAN program. A MIDI Stop command will also be sent.
STATUS generates the most consistent MIDI Clock you will find.
STATUS stores the tempo for each of its 128 programs. When a MIDI Program Change is received on the MIDI Receive Channel and an Internal Auto or Internal Manual clock mode is used, STATUS immediately recalls the stored tempo. If MIDI Clock is being sent, any new clock speed is used immediately.
Note: When using an internal clock mode, STATUS blocks any external clock
In Tempo Display Mode, the top row flashes in time with quarter notes in the style selected using the Global Variable “BPM Flashing Mode”. The bottom row shows the current Beats Per the Minute (BPM) in the format “xxx.x BPM”.
If the internal clock is stopped, the message “NO CLOCK” is displayed, along with “---.- BPM”. Turning the knob with the clock stopped will advance to the next Display Mode.
To start the internal clock, press the Knob while on the BPM screen. To change the internal clock speed, turn the Knob.
Note: The internal clock can also be controlled using the optional Start/Tap switch, using Control Changes, and with an external MIDI Start command.
Pressing the Knob while the clock is running advances to another screen which says “TURN TO STOP”. Turning the Knob at this screen will stop the internal clock and return to the BPM display screen.
If “TURN TO STOP” is not engaged, pressing the Knob again, advances to a screen which says “TURN TO SAVE”. Turning the Knob at this screen will cause STATUS to save the current tempo at the current program number, briefly display “CHANGES *SAVED*”, and return to the top-level “INTERNAL CLOCK” screen.
If “TURN TO SAVE” is not engaged, pressing the Knob again advances to a screen which says “TURN TO EXIT”. Turning the Knob at this screen will cause STATUS to return to the top-level “INTERNAL CLOCK” screen with the clock still running.
If “TURN TO EXIT” is not engaged, pressing the Knob again advances to Superflash mode where all LED segments flash in time with quarter notes. Turning the Knob changes the internal clock speed. Pressing the Knob will return to the BPM display screen.
Note: Revised tempos are not saved unless the “TURN TO SAVE” function is used, or the tempo is stored from MIDI MAP mode. It is also possible to save the current tempo using the optional Start/Tap Switch.
Note: Turning the Knob does not affect the tempo when the internal clock is stopped, nor does it alter the tempo of an external clock.
Upon receipt of a MIDI Program Change message, if the selected STATUS program uses INT-AUTO, STATUS recalls the stored tempo, and, if it the clock was stopped, sends the MIDI Start command, then starts sending MIDI Clock.
Note: If the internal clock was manually stopped, sending the same program change number again will re-start the clock
Upon receipt of a MIDI Program Change message, if the selected STATUS program is set for INT-MAN, STATUS recalls the stored tempo, and, if it the clock was going, stops it and sends the MIDI Stop command.
In Internal, Manual-Start Clock Mode, clock must always be manually started using the Knob, the Optional Start/Tap Switch, or a MIDI Control Change.
Tip: If you do no want to use MIDI Clock for a particular program, choose INT-MAN.
Upon receipt of a MIDI Program Change message, if the selected STATUS program is set for INT-LAST, STATUS continues using the last INTERNAL tempo.
Internal, Last Tempo Clock Mode does not automatically start or stop the clock, instead maintaining the current status.
Note: If switching from External Clock Mode, the prior internal started/stopped status will be used.
Internal, Last Tempo Clock Mode has an independent Tap Ratio which can be selected during Map Mode (as do the other internal clock modes).
Each Internal Clock program has an associated Tap Ratio (usually the time between your taps is a quarter note. STATUS will take your quarter note rate and output it at any of the following rates selected while in MIDI Map Mode:
· Quarter Notes (tap speed)
· Dotted Eighths (3:4 ratio)
· Quarter Note Triplets (2:3 ratio)
· Eighth Notes (1:2 ratio)
· Eighth Note Triplets (1:3 ratio)
· Sixteenth Notes (1:4 ratio)
Note: The Internal BPM Limit you select in Globals in the web programmer is also subject to the tap divisions, therefore you will hit the upper limit sooner as you use faster Tap Ratios.
Note: Tap Ratio can be changed during MIDI Map Mode or using the Online Programmer
The START Button is used to start and stop the MIDI Clock data output.
If MIDI Clock is stopped, pressing the START/STOP Button will cause a MIDI Start command to be sent, followed by a constant stream of MIDI Clock data. The Tempo will be reset and synchronized each time the clock is started.
Note: MIDI Start, Stop, and Clock are not channel-specific
If MIDI Clock is running, pressing the START/STOP Button will cause a MIDI Stop command to be sent.
Note: If the tempo has been altered but not saved, stopping then re-starting the same Program does not recall the stored tempo, instead the altered tempo will continue to be used rather than the stored tempo.
If a different Program is used, and later the previous Program is recalled, the previous Program will recall its stored tempo rather than the altered tempo. In order to keep an altered tempo, the Program must be saved, as described below.
Tip: Pressing the START Button During External Clock mode sends a MIDI Start command. This allows you to start or reset a sequencer.
The TAP Button (E) performs two separate functions, Tempo Control and Program Storage.
Note: The Tap button is disabled while using an External Clock.
The Internal MIDI Clock tempo can be continually adjusted on-the-fly with the TAP Button. This is true whether or not MIDI Clock is being sent.
Pressing the TAP Button two or more times adjusts the tempo. The new tempo starts right after the latest tap.
Maximum tap interval = 2.5 seconds (24 bpm)
Minimum tap interval = 0.25 seconds (240 bpm) or 0.2 seconds (300 BPM), selected with the Global MIDI Clock Upper Limit
The time between the last two taps corresponds to the length of a quarter note unless a different Tap Ratio is used, in which case the tap interval is multiplied by the Tap Ratio.
If the time between the last two taps is shorter than the Minimum Tap Interval (based on the Tap Ratio), the “TAPPED TOO FAST” message is displayed.
Tip: Tapping a tempo with MIDI Clock stopped can set up a tempo before you press Start
Tip: You can also use the Tap Button during MIDI Map Mode at the BPM screen
STATUS does not automatically store Tempo changes.
If an Internal Auto or Manual Tap Mode is being used for the current preset, holding down the first press of the TAP Button for more than 2.5 seconds causes STATUS to save the current tempo at the current preset. Once the TAP Button has been held long enough, STATUS displays "CHANGES *SAVED*".
Note: If you tap in a new tempo, you need to wait until you are done tapping and Tap Mode ends (about 2.5 seconds after the last tap) before you can store the new tempo.
Note: Tempos can also be adjusted and stored in MIDI Map Mode and Tempo Display Mode. If a tempo is selected using the Knob during Tempo Display Mode, it can also be stored with the TAP button
Incoming MIDI Start (FA) and Stop (FC) commands can be used to start and stop the internal clock.
The Internal MIDI Clock Generator can also be controlled with the following MIDI Control Changes received on the Clock Control Channel:
| Function | Controller | Values |
Tap |
114 | Any Value. Note: CC taps are also subject to the selected Tap Ratio |
| Tempo (even values) | 86 | 0-127 Tempo = 24 + (value * 2) (24-278 BPM in even increments) |
| Tempo (odd values) | 87 | 0-127 Tempo = 25 + (value * 2) (25-279 BPM in even increments) |
| Start/Stop MIDI Clock | 88 | Any value. Starts and Stops the Internal MIDI Clock generator. Actual MIDI Start (FA) and Stop (FC) commands are also sent from STATUS to downstream devices. |
CC taps are subject to the Tap Ratio selected in Map Mode. The time between the last two taps corresponds to the length of a quarter note unless a different Tap Ratio is used.
Note: Tap Ratio can be changed during MIDI Map Mode or using the Online Programmer
If the time between the last two taps is shorter than the Minimum Tap Interval (based on the Tap Ratio), the “TAPPED TOO FAST” message is displayed.
CC tempo values are not automatically stored, and must be stored at Tempo Display Mode or during MIDI Map Mode.
Note: Sending a CC Tempo does NOT switch STATUS to Internal Clock Mode when using an External Clock, but STATUS will store that tempo and use it if you next switch to an INT-LAST program.
Note: CC88 can also be used during External Clock Mode to send MIDI Start and Stop commands, which will reset most sequencers.
If the Global Variable, Synchronized CC Tempo Data is set to “ON”, STATUS transmits Control Changes on the quarter note in time with its Internal Clock or an External Clock. A number of companies use this method rather than MIDI Clock, including Line 6 and T-Rex.
Syncing Line 6 and other pedals that don't use MIDI Clock
Note: Tap Tempo Data is only sent while MIDI Clock data is being received or sent.
Note: Connected devices may have a noticeable time lag before adjusting to a new tempo, as it takes at least two CC “taps” to set a new tempo, which corresponds to 2 quarter notes.
Data Display Mode is a useful tool to determine what MIDI data is flowing into STATUS. Data Display Mode can also be used to display just STATUS Messages generated by a DAW or other device without showing Program Names.
While in Data Display mode, MIDI Mapping is stopped in all modes except SYS MSG, STATUS does not respond to any incoming MIDI data, and merely passes it all through and displays it if that data type is selected. Data Display Mode also ignores your Global Variable settings and instead shows all data in the chosen category.
Note: If your device sends data in running status format, you will need to stop and re-start it after entering Data Display Mode, or running status messages may be ignored.
When Data Display Mode is accessed, the message “DATA DSP.” Appears in the top row, and the selected type of data is shown in the bottom row.
Pressing the Knob displays the “SELECT” message. Turn the Knob to select the data display option, then press the Knob to return to the top screen.
There are 7 data display options:
PGM ONLY shows Program Numbers and the corresponding MIDI Channel.
CC ONLY shows Control Change data, including MIDI Channel, Controller number, and Controller value.
NOTES shows Keyboard data including MIDI Channel, Note + octave, and Velocity
REALTIME shows only MIDI START, MIDI CONTINUE, and MIDI STOP messages
PITCHBND shows MIDI Channel and Pitch Bend data received (Coarse value on the left, and Fine value on the right)
ALL shows all listed categories of incoming MIDI data as well as STATUS Messages, BUT does not respond to Program Changes or any other MIDI data.
Tip: If you want to see the BPM coming into STATUS, then use the Tempo Display Mode and select or create an External Clock program.
SYS MSG is unique and displays only STATUS Messages while blocking Program Names. Unlike the other Data Display modes, STATUS otherwise functions normally, performing mapping, re-mapping, generating clock, etc.
SYS MSG is useful when you wish to display STATUS Messages and be able to change programs without recalling the stored Program Name. For example if you are using a DAW and playback includes program changes as well as STATUS Messages, and you only want to see the STATUS Messages, select SYS MSG.
STATUS Messages can also be generated using our online STATUS Message Generator then pasted into your application’s MIDI timeline.
Display custom STATUS Messages at any time using SysEx Data.
STATUS messages are particularly useful in combination with DAW programs like Reaper, ProTools, CakeWalk, Sonar, and others which can send SysEx messages during playback. Display the first words to a verse, count in, show chord changes, song parts, tempo flashing, etc.
Following is a table of the STATUS Characters that can be displayed, together with their corresponding hexadecimal (hex) value:
| Character | Hex Value |
| blank | 0 |
| A | 1 |
| B | 2 |
| C | 3 |
| D | 4 |
| E | 5 |
| F | 6 |
| G | 7 |
| H | 8 |
| I | 9 |
| J | A |
| K | B |
| L | C |
| M | D |
| N | E |
| O | F |
| P | 10 |
| Q | 11 |
| R | 12 |
| S | 13 |
| T | 14 |
| U | 15 |
| V | 16 |
| W | 17 |
| X | 18 |
| Y | 19 |
| Z | 1A |
| 0 | 1B |
| 0. | 1C |
| 1 | 1D |
| 1. | 1E |
| 2 | 1F |
| 2. | 20 |
| 3 | 21 |
| 3. | 22 |
| 4 | 23 |
| 4. | 24 |
| 5 | 25 |
| 5. | 26 |
| 6 | 27 |
| 6. | 28 |
| 7 | 29 |
| 7. | 2A |
| 8 | 2B |
| 8. | 2C |
| 9 | 2D |
| 9. | 2E |
| + | 2F |
| - | 30 |
| * | 31 |
| / | 32 |
| \ | 33 |
| > | 34 |
| < | 35 |
| . | 36 |
| _ | 37 |
| | left | 38 |
| | center | 39 |
| | right | 3A |
| || left | 3B |
| || right | 3C |
| | | | 3D |
| ||| | 3E |
| top bar | 3F |
| middle bar | 40 |
| bottom bar | 41 |
| top and middle bar | 42 |
| top and bottom bar | 43 |
| middle and bottom bar | 44 |
| all 3 bars | 45 |
| arrow up | 46 |
| arrow down | 47 |
| fork left | 48 |
| fork right | 49 |
| fork up | 4A |
| fork down | 4B |
| triangle left | 4C |
| triangle right | 4D |
| triangle up | 4E |
| triangle down | 4F |
| diagonal 8 | 50 |
| infinity | 51 |
| Musical “flat” b | 55 |
STATUS Messages must be formatted as follows: F0 00 02 29 01 [message of 1-16 characters] F7
Important: If the message is less than 16 characters, then the value 0x75 must be sent prior to F7
STATUS Messages are displayed during Program Name Display mode and during the Data Display modes SYS MSG and ALL.
STATUS Messages can also be generated using our online STATUS Message Generator then pasted into your application’s MIDI timeline.
STATUS provides a number of powerful tools for enhancing your MIDI system.
Custom Preset Names can be displayed for each program. Separate MIDI Clock tempos can be stored. Extensive MIDI Mapping and re-mapping is also possible.
Note: All incoming MIDI data is blocked during any edit or copy mode.
STATUS stores custom messages of up to 16 characters for each of its 128 programs.
How to Name Presets
To change a custom message, send STATUS a Program Change to switch to the preset you want to edit.
Turn the Knob until you reach PGM NAME DISPLAY mode. After two seconds, STATUS switches to the current program name. Hold down the Knob until the display says “EDIT MODE ON”, then release and the first character will be blinking.
Turn the Knob to select the character for that segment. Press the Knob to advance to the next segment.
Tip: To quickly go backwards or forwards, press and hold the Knob while turning.
Repeat until your message is complete, then hold down the Knob until the display says “CHANGES *SAVED*”. Release to exit.
Note: Shorter messages, and those with more blank segments, are brighter than longer ones.
Note: Preset Names can also be created using our Online Programmer, but note that the full range of characters is not available.
Default Preset Name: PROGRAM [preset number]
STATUS stores the tempo associated with each of its 128 programs.
The Clock Tempo can be stored during MIDI Map Mode, during Tempo Display Mode, or using the Optional Start/Tap Switch.
STATUS sends up to 5 additional Program Changes in response to each incoming MIDI program
STATUS sends up to 16 additional Control Change or Note on Messages in response to each incoming MIDI program
STATUS re-maps two (2) separate MIDI Controllers to a different controller number and MIDI channel for each program. The controller can also be re-mapped to a smaller range and/or have its output inverted.
During MIDI Map Mode, you will adjust the Program Variables. Each Program Variable is separately stored for each MIDI Program.
You can modify presets using our online programmer or directly on STATUS.
Editing Presets Online
Editing Presets using STATUS
First, send STATUS a Program Change to recall the preset you want to edit.
Note: All incoming MIDI data is blocked during Program Edit Mode. As such, you must switch to the desired program before entering Edit Mode.
Turn the Knob until you reach the MIDI MAP screen.
To enter MIDI Map Mode, hold down the Knob. You will first see the message “HOLD TO *EDIT* and then “RELEASE TO EDIT”. Release the button to enter MIDI Map Mode.
Pressing the button steps STATUS through the Program Variables. Turning the Knob adjusts the values.
Note: If you hold the button down, then turn the knob while holding, you can quickly cycle through the Program Variables.
Holding the button for about 2 seconds without turning the knob causes STATUS to exit MIDI Map Mode and display the message “CHANGES *SAVED*”. When you release you will return to the MIDI MAP screen.
Tip: Each time a Program Change, Control Change, or Note On message value is changed, STATUS sends the corresponding MIDI data for the modified message. This allows you to monitor the changes made by STATUS while programming.
Program Change MIDI Channels
STATUS sends up to five (5) Program Changes in response to an incoming Program Change. The 5 outgoing Program Changes are labeled A-E. Each outgoing Program Change can be sent on any MIDI channel.
Display: CHAN.
Range: 1-16 and OFF
Function: Sets the MIDI Channel for an outgoing Program Change [A-E].
Default: MIDI Channel 1
Program Change Send Values
STATUS sends up to five (5) Program Changes in response to an incoming Program Change. The 5 outgoing program changes are labeled A-E.
Note: STATUS always re-sends the original program change on its MIDI channel. The incoming program change is always re-sent before any new data is sent
Display: PC-[A-E]
Range: 1-128 and OFF
Function: Sets the value of an outgoing Program Change [A-E]. If set to OFF, then no Program Change is sent.
Note: When programming STATUS manually, you only ever see the first “OFF” message. STATUS skips all other messages that are also OFF.
Default: PC-A using the current preset number on MIDI Channel 1 is the default Program Value, PC-[B-E] are OFF.
Bank Select
Some MIDI devices use more than 128 programs. These additional programs are accessed using a “Bank Select” command, which is either Control Change 0, Control Change 32, or both, depending on the receiving device.
Consult the manual for the device you wish to control for more information on using “Bank Select” commands
STATUS always sends Control Changes 0 and 32 before sending any Program Changes.
STATUS sends these “Bank Select” commands in the order they are programmed using Control Changes [A-P], as described in the next section.
Control Change Controller or Note On Values
STATUS will send up to sixteen (16) Control Changes / Note On messages in response to an incoming Program Change. The 16 outgoing Control Change / Note On messages are labeled A-P.
Display: [CC or NO]-[A-P]
Range: 0-127 and OFF
Function: Sets the outgoing Controller or Note value of an outgoing message [A-P]. If set to OFF, then no message is sent.
Note: When programming STATUS manually, you only ever see the first “OFF” message. STATUS skips all other messages that are also OFF.
Default: CC-[A-P] are OFF.
Table of MIDI Note On Values
| Octave | C | C# | D | D# | E | F | F# | G | G# | A | A# | B |
| -1 | 0 | 1 | 2 | 3 | 4 | 5 | 6 | 7 | 8 | 9 | 10 | 11 |
| 0 | 12 | 13 | 14 | 15 | 16 | 17 | 18 | 19 | 20 | 21 | 22 | 23 |
| 1 | 24 | 25 | 26 | 27 | 28 | 29 | 30 | 31 | 32 | 33 | 34 | 35 |
| 2 | 36 | 37 | 38 | 39 | 40 | 41 | 42 | 43 | 44 | 45 | 46 | 47 |
| 3 | 48 | 49 | 50 | 51 | 52 | 53 | 54 | 55 | 56 | 57 | 58 | 59 |
| 4 | 60 | 61 | 62 | 63 | 64 | 65 | 66 | 67 | 68 | 69 | 70 | 71 |
| 5 | 72 | 73 | 74 | 75 | 76 | 77 | 78 | 79 | 80 | 81 | 82 | 83 |
| 6 | 84 | 85 | 86 | 87 | 88 | 89 | 90 | 91 | 92 | 93 | 94 | 95 |
| 7 | 96 | 97 | 98 | 99 | 100 | 101 | 102 | 103 | 104 | 105 | 106 | 107 |
| 8 | 108 | 109 | 110 | 111 | 112 | 113 | 114 | 115 | 116 | 117 | 118 | 119 |
| 9 | 120 | 121 | 122 | 123 | 124 | 125 | 126 | 127 |
Note 60 is always "Middle C", and all other notes are relative. The absolute octave numbers shown above are based on Middle C = C4.
Various models of MIDI devices and software programs use different octave numbers for note names. If your MIDI software/device considers 0 the lowest octave of the MIDI note range, then middle C is C5, and the highest possible note is G10 (Note 127).
MIDI Note 69 is used for A440 tuning, that is the A note above middle C.
Message Send Type (Note On or Control Change)
Display: NOTE ON [NOTE] or CONTROL [CC]
Range: NOTE or CC
Function: Determines whether an outgoing message [A-P] is a Control Change or Note On.
Note: When programming this variable, the asterisk (*) will move back and forth between NOTE and CC. When programming the message Send Value (above), STATUS will instead display “NOTE ON” or “CONTROL”.
Default: CC (Control Change)
Control Change or Note On MIDI Channels
STATUS will send up to sixteen (16) Control Changes / Note On messages in response to an incoming Program Change. The 16 outgoing Control Change / Note On messages are labeled A-P.
Each outgoing Control Change or Note On message can be sent on any MIDI channel.
Display: CHAN.
Range: 1-16 and OFF
Function: Sets the MIDI Channel for an outgoing Control Changes / Note On Message [A-P].
Default: MIDI Channel 1
Control Change Data Value or Note On Velocity
STATUS will send up to sixteen (16) Control Change / Note On messages in response to an incoming Program Change. The 16 outgoing Control Change / Note On messages are labeled A-P during Map Mode.
Display: VEL. or VAL.
Range: 0-127
Function: Sets the Data Value of a Control Change message or the Velocity of a Note On message.
Note: A Velocity of zero is treated as a "Note Off" message. STATUS does not automatically send “Note Off’ messages or zero-value “Note On” messages. If you want that to happen, you will need to use a later Control Change slot to send a Note On message with a value of zero.
Default: 127 (Max.)
Note: STATUS sends out the controller values during editing so you can hear how it affects the device you want to control.
Controller 1 and 2 Destination
STATUS can change the Controller Number and/or MIDI Channel of an incoming Controller Source. The incoming Controller Source is Global Variable CTL.[1 or 2] MAP CC., described below.
Display: CTL.[1 or 2] MAP DEST.
Range: 1-31, BLOCK, 33-127, PASS
Function: Sets the outgoing Controller Number. This is the number that replaces the incoming Controller Source (Global Variable CTL.[1 or 2] MAP SRC.)
Note: CC0 and CC32 are reserved for Bank Select and are not available as outgoing controller values.
If you want to pass the original Controller Source for a particular preset rather than re-mapping, set this to “PASS”, which appears in place of CC0. If you want to block the incoming Controller Source with no re-mapping, choose “BLOCK” which appears in place of CC32.
Note: If the Global variable CTL.[1 or 2] MAP SRC. is set to OFF, CTL.[1 or 2] MAP DEST. is not used.
Defaults: CTL.1 = CC 1; CTL.2 = CC11
Controller 1 and 2 Outgoing MIDI Channel
STATUS can change the Controller Number and/or MIDI Channel of an incoming Controller. The incoming Controller Source is Global Variable CTL.[1 or 2] MAP SRC.
Display: CTL.[1 or 2] MAP CHAN.
Range: 1-16
Function: Sets the outgoing MIDI channel for the re-mapped Controller.
Note: If the Global variable CTL.[1 or 2] MAP SRC. is set to OFF, CTL.[1 or 2] MAP CHAN. is not used.
Default: CTL.1 = Channel 1; CTL.2 = Channel 2
Controller 1 and 2 Value Ranges
The re-mapped controllers can be restricted to a limited range of output values. If a limited range is selected, the incoming controller will be scaled to match the outgoing range, so you can keep using the full range of your expression pedal or other MIDI controller while restricting its output values to the useful range for the particular parameter you are controlling.
If the “LO” range value is greater than the “HI” range value, STATUS will invert the output, making your controller work backwards (low becomes high, high becomes low).
Display: RANGE-[LO or HI] CTL.[1 or 2]
Range: 0-127
Function: Sets the lower and upper limits for the re-mapped Controller values.
Note: If the Global variable CTL.[1 or 2] MAP SRC. is set to OFF, RANGE-[LO or HI] CTL.[1 or 2] is not used.
Default: LO = 0; HI = 127
Note: STATUS will send out the controller value during editing so you can hear how it affects the device you want to control.
MIDI Clock Source
STATUS can use an external MIDI Clock source, or generate its own rock-solid clock. Select between 4 MIDI Clock Source modes.
Display: CLCK SRC
Range:
EXTERNAL External Clock
INT-LAST Internal Clock, Use Last Tempo
INT-AUTO Internal Clock, Auto-Start
INT-MAN Internal Clock, Manual Start
Function: Sets the source for MIDI Clock for the program.
Note: Internal MIDI Clock can selectively be stopped and started by changing from INT-AUTO to INT-MAN.
Default: INT-AUTO Internal Clock, Auto-Start
BPM (for Internal Clock (Auto or Manual))
Note: BPM and Tap Ratio are skipped if External Clock is selected.
When programming an Internal Auto or Manual type program, STATUS will start MIDI Clock and let you adjust it’s speed on this page by turning the Knob.
Display: ---.- BPM (with flashing top row)
Range: 24-[240 or 300, depending on MIDI Clock Upper Limit]
Function: Sets the BPM clock speed in beats per minute (BPM).
Tip: Try turning the Knob at different speeds.
Note: BPM can also be adjusted with the optional Tap Switch. If tapping with the Tap Switch in Map Mode, the temporary Tap Ratio will be applied.
Default: 120 BPM
Tap Ratio (for any Internal Clock mode)
Each Internal Clock program has an associated Tap Ratio which determines the relative timing of your taps from the optional Start/Tap Switch or CC 114’s.
Display: TP.RATIO
Range:
QUARTER = Quarter Notes (tap speed)
DOT 8TH = Dotted Eighths (3:4 ratio)
1/4 TRIP. = Quarter Note Triplets (2:3 ratio)
EIGHTH = Eighth Notes (1:2 ratio)
1/8 TRIP. = Eighth Note Triplets (1:3 ratio)
16TH = Sixteenth Notes (1:4 ratio)
Function: Sets the Tap Ratio for the program.
Note: The Internal BPM Limit you select in Globals is also subject to the tap divisions, therefore you will hit the upper limit sooner as you use faster Tap Ratios. In that case, STATUS will say “TAPPED TOO FAST” is this what is says
Default: QUARTER Quarter Notes (tap speed)
Copying presets from one location to another is simple.
First, send STATUS a Program Change for the preset that you want to copy.
Turn to the PROGRAM COPY screen. Press and hold down the Knob. You will first see the message “HOLD TO *COPY*”, then "RELEASE TO COPY". Release the Knob and the screen will show the program number of the COPY source (your current program) on the top line. The bottom line will say “TO” and initially will say “OFF”
Turn the Knob to select the preset number where you want the make the copy.
Note: If you select “MIDI”, then the data for the current program will be sent to the MIDI Output in SysEx format for saving on a computer or other compatible device. Press the Knob until STATUS says "MIDI *SENT*"
Press and hold the button again. The display will say “HOLD TO SAVE”. Once you have held long enough, STATUS will say “CHANGES *SAVED*”.
After copying you are on the destination preset.
If you change your mind, select OFF or the same program number. After holding the button, the display will say “COPY ABORTED”, then return to the PROGRAM COPY screen when you release.
Note: During Program Copy Mode, all incoming MIDI data is blocked.
Global Variables affect the way STATUS works for every preset.
You can modify Globals using our online programmer or directly on STATUS.
Modifying Globals Online
To access Global Variables, hold down the button while powering STATUS on. The message “EDIT GLOBALS” will be displayed until you release the button.
Pressing and releasing the button quickly causes STATUS to cycle through the Global Variables in the order shown below. Turning the knob will adjust the value of the Global Variable.
To Exit and Save Changes, press and hold the Knob until the message “GLOBALS *SAVED*” is displayed. Release the Button and STATUS will restart and resume normal operation.
Modifying Globals using STATUS
MIDI Receive Channel
Display: MIDI RCV CH.
Range: 1-16 and OMNI
Function: Sets the MIDI Channel to which STATUS responds. This is the MIDI Channel to send Program Changes to STATUS, and the channel for your incoming Expression Controller.
Note: MIDI RCV CH. also interacts with the Global Variable Pass or Block incoming data on the Wrong Channel [PASS ALL CHAN.], below, in that this channel is the “Right” channel which is not blocked when passing through Program Changes, Control Changes, and Keyboard Data.
Default: MIDI Channel 15
Initial Display Mode
Display: STARTUP
Range: PGM NAME, BPM, FLASHER, and DATA DSP.
Function: Sets the Display Mode which appears when STATUS starts.
Note: FLASHER flashes all asterisks in time with MIDI Clock and is part of Tempo Display Mode Note: If DATA DISPLAY Mode is chosen, the particular Display Mode chosen with the next Global Variable (DATA DSP.) will appear.
Default: PGM NAME
Data Display Mode
Display: DATA DSP.
Range: PGM ONLY, CC ONLY, NOTES, REALTIME, PITCHBND, ALL, and SYS MSG
Function: Sets the Display Mode which first appears each time Data Display Mode is accessed.
Note: The particular Data Display Mode can still be changed during runtime.
Default: PGM NAME
Clock Control Channel
Display: BPM CTRL CHAN.
Range: 1-16
Function: Sets the MIDI Channel for incoming Control Changes related to Clock Control Via MIDI Control Changes
Default: 15
Note: This channel is independent of the STATUS MIDI Receive Channel
MIDI Clock Upper Limit
Display: BPM MAX
Range: 240 or 300
Function: Sets the upper BPM limit for MIDI Clock signals generated by STATUS. This limit is enforced when selecting a tempo via the Knob, via the Start/Tap Switch, and via CC Tap
Note: This limit is NOT retroactively applied to stored tempos if switched from 300 to 240 BPM.
Note: This limit is not enforced when sending specific BPM values via CC’s
Note: This limit is divided by the Tap Ratio, for example, if you choose 1/8 note tap ratio (which is twice as fast as the standard 1/4 note ratio), then tapping over 120 BPM will show a “TAPPED TOO FAST” message, since the resulting speed would be over 240 BPM.
Default: 300
BPM Flashing Mode
Display: FLASHING
Range: Asterisk bars [****----], Spinners, Asterisk progress bar [**------]
Function: Sets the display mode for the upper row of characters when viewing Internal BPM in Tempo Display Mode
Note: Flashing only occurs when MIDI Clock is being actively sent by the Internal Clock, or received in External Clock mode
Default: Asterisk bars [****----]
Synchronized CC Tempo Data
When set to “ON”, STATUS transmits Control Changes at each quarter note in time with its Internal Clock or an External Clock. A number of devices use this method rather than MIDI Clock
Display: TAP CC
Range: OFF, ON
Function: Determines whether synchronized CC Tempo Data is sent along with MIDI Clock
Note: CC Tempo Data is only sent while MIDI Clock is being internally generated, and while MIDI Clock data is being received during External Clock Mode.
Default: OFF
Synchronized CC Tempo Controller
Note: If the previous Global (TAP CC) is set to OFF, this Global Variable will be skipped
Display: TAP CC CTL.
Range: 1-31, 33-127
Note: CC0 and CC32 are reserved for Bank Select and are not available as output values
Function: Determines the Controller Number for CC Tempo Data
Note: The outgoing Controller Value is always 127
Default: 64 (Sustain pedal, used by Line 6 and Behringer)
CC 20 T-Rex Replica Delay
CC 62 Free The Tone Flight Time Delay
CC 64 Line 6 and Behringer Devices
Synchronized CC Tempo Channel
Note: If the Global (TAP CC) is set to OFF, this Global Variable will be skipped
Display: TAP CC CHAN.
Range: 1-16
Function: Sets the MIDI Channel for CC Tempo Data.
Default: 1 (Line 6 default)
Pass or Block incoming CC and Keyboard data on the Wrong Channel
Display: PASS ALL CHAN.
Range: ON (Pass) and OFF (Block)
Function: Interacts with PASS CC THRU and PASS KEY DATA and either passes data through on any channel or only on the MIDI Receive Channel.
Note: If OFF, STATUS will also block all Program Changes except those that are on the MIDI Receive Channel, which are always passed through.
Note: If MIDI RCV CH. is set to OMNI, then this Global setting has no effect.
Default: ON (Pass incoming CC and KEY data on the Wrong Channel)
Pass or Block incoming Control Change Data
Display: PASS CC THRU.
Range: ON (Pass) and OFF (Block)
Function: Determines whether or not incoming Control Changes are passed through.
If PASS ALL CHAN. is ON, or if MIDI RCV CH. is set to OMNI, then data on any MIDI channel will be passed through, otherwise only data on the MIDI RCV CH. will be passed.
Note: Re-Mapping of the two Controller Sources will still function even if PASS CC THRU. is OFF. In order to block ALL Control Changes, set both of the Controller Sources to Re-Map to OFF.
Default: ON (Pass incoming Control Changes)
Pass or Block incoming Keyboard Data
Display: PASS KEY DATA.
Range: ON (Pass) and OFF (Block)
Function: Determines whether or not incoming Keyboard data is passed through. This includes Note Off, Note On, Aftertouch, Channel Pressure, and Pitch Wheel.
If PASS ALL CHAN. is ON, or if MIDI RCV CH. is set to OMNI, then data on any MIDI channel will be passed through, otherwise only data on the MIDI RCV CH. will be passed.
Default: ON (Pass incoming Keyboard Data)
Pass or Block incoming Song Select Data
Display: SONG SEL BLOK.
Range: ON (Pass) and OFF (Block)
Function: If ON, then incoming Song Select data is blocked. If OFF, then this data is passed through.
Note: Song Select data is not on any particular MIDI channel.
Default: ON (Block incoming Song Select Data)
Controller Sources to Re-Map
STATUS can change the Controller Number and MIDI Channel of two incoming Controller Sources, as well as dynamically modifying their ranges. The outgoing Controller Values, MIDI Channels, and Ranges are set for individual programs by the variables CTL.[1 or 2] MAP DEST., CTL.[1 or 2] MAP CHAN., and RANGE-[LO or HI] CTL.[1 or 2] described above.
Display: CTL.[1 or 2] MAP SRC.
Range: 1-31, 33-85, 90-113, 115-127, and OFF
Note: CC0 and CC32 are reserved for Bank Select and are not available as Controller Sources. CC 86, 87, 88, 89, and 114 are used by STATUS for various functions and are also unavailable as Controller Sources
Function: Sets the Controller Source that gets re-mapped. The incoming Controller must also be on the MIDI RCV CH. Re-mapping can also be turned OFF using this Global, or for individual programs in MIDI Map Mode.
Note: If CTL.[1 or 2] MAP is ON, then the selected Controller will be re-mapped even if PASS CC THRU. is OFF.
Note: If CTL.[1 or 2] MAP is ON and PASS CC THRU. is ON, only the re-mapped value will be sent (the original value will not be passed through). You can still choose to pass through the original value rather than re-mapping for a particular preset.
Default: CTL1 = CC 1 (Modulation Wheel); CTL2 = CC 11 (Expression Controller)
Tip: You may use the same Controller Source for both CTL.1 and CTL.2, then re-map the incoming values to 2 different locations per program, thereby controlling 2 devices with one controller!
Globals Sysex Dump
STATUS can output the Globals settings as SysEx data for storage on your computer or other compatible device. You can later send this data to STATUS to restore your Globals settings.
To use this feature, connect your receiving device to the MIDI OUT, turn the Knob until the display says “ON”, then press the Knob to send the Globals data.
Display: GLOBALS SEND
Range: OFF and ON
Function: Outputs the Globals settings as SysEx data.
Default: OFF
STATUS Factory Reset
STATUS can be reset to factory settings.
WARNING: This will reset your Globals and erase ALL program names and mapping data, so be sure you really want to do this!!!
To reset, turn the Knob until the display says “ON”, then press the Knob. STATUS will be reset and restart.
Display: FACTORY RESET.
Range: OFF and ON
Function: Resets STATUS to Factory Settings
Default: OFF (do not reset)
Tip: STATUS an also be reset via a SysEx Command using our online Globals Programmer
In addition to the selective filtering chosen with Globals, STATUS always filters certain MIDI data:
MTC Quarter Frame Messages, F1
Song Position Pointer, F2
Tune Request, F6
Tick, F9
Active Sense, FE
Reset, FF
Some MIDI Devices send incomplete messages that are in the same category as the previous message. For example if you already played a note then play another note, the second message is only the note number, and excludes the “hey I’m a note” part of the message. This method is called “Running Status”.
Guitar-related gear virtually never uses this method of sending MIDI data. However, some keyboard and computer-based gear use Running Status because data can be sent faster.
STATUS will read and respond to Program and Control Change messages sent in the Running Status format.
If STATUS is set to Pass through Program Changes, Control Changes, or Keyboard data, and that data shows up in the Running Status format, STATUS always re-transmits that data in its complete form.
STATUS never transmits data in the Running Status format. The MIDI Thru Jack always passes incoming data unchanged.
Note: If a huge amount of MIDI data is being passed through STATUS, some data may be lost since MIDI has a limited bandwidth
STATUS does not use MIDI Phantom Power.
RIFF-STEP - DigiTech Whammy Enhancer
Many more available soon!
Function |
Used |
Generated |
Passed |
Comment |
Note On |
No |
Yes |
Yes* |
|
Note Off |
No |
1 |
Yes* |
1) Note Off messages can be generated by sending a Note On message with Velocity = 0. |
Aftertouch |
No |
No |
Yes* |
|
Control Change |
Yes |
Yes |
Yes* |
Incoming Controller Numbers 1-31, 33-85, 90-113, 115-127 can be re-mapped. Controller Numbers 86-89 and 114 are used by STATUS to perform various functions. MIDI reserves Controller Numbers 0 and 32 for Bank Select. |
Program Change |
Yes |
Yes |
Yes |
|
Channel Pressure |
No |
No |
Yes* |
|
Pitch Bend |
No |
No |
Yes* |
|
System Common |
No |
No |
2 |
2) All System Common messages are filtered except Song Select. |
System Exclusive (SysEx) |
Yes |
Yes |
Yes |
|
System Realtime |
Yes |
Yes |
Yes |
MIDI Clock, Start, Stop, and Continue are passed through, Active Sense and Reset are blocked. STATUS generates MIDI Start, Stop, and Clock messages. |
* Can be filtered via Global Settings
Problem |
Solution |
STATUS will not turn on. |
Plug in 9 volt DC, 2,1mm Tip Negative Power Supply that can deliver at least 300mA |
Clicking or Noise |
Use a separate or isolated Power Supply for STATUS |
STATUS is not responding to MIDI Program Changes |
Make sure your other MIDI device is configured to send MIDI Program Changes on the same MIDI Channel as STATUS. Consult the User’s Guide for that device. |
STATUS is not receiving External MIDI Clock |
Make sure your other MIDI device is configured to send MIDI Clock. Consult the User’s Guide for that device. If it cannot send MIDI Clock, use the STATUS Internal MIDI Clock. |
Downstream MIDI device is not receiving MIDI Clock |
Make sure your other MIDI device is configured to receive MIDI Clock. Consult the User’s Guide for that device. Often you will need to set that device to “SLAVE” mode. |
STATUS is not responding to STATUS Messages |
Make sure your SYSEX message has been formatted correctly. Make sure your MIDI device can send SysEx messages (sometimes you need to enable SysEx send) |
Connected Device is not synchronized to CC Tap |
Make sure the connected device is set to receive MIDI data on the Synchronized CC Tempo Channel, which can be different from the STATUS MIDI Receive Channel. Make sure incoming MIDI Clock speed does not exceed the limits of the receive device. |
General Guidelines
If you are daisy chaining MIDI devices, the total MIDI cable length must be considered if any MIDI devices in the chain do not amplify the data signal.
Step Audio is proud of its products and warrants this unit for a period of two (2) years from the date of purchase to be free from defects in materials and workmanship under normal use and service, as long as the unit is used with an approved power supply, and consistent with these instructions.
Contact info@StepAudio.net regarding repairs. Any user repair attempts void the warranty. PROOF OF PURCHASE IS REQUIRED FOR WARRANTY REPAIRS.
 Specifications
STATUS is powered by standard "BOSS" type 9-volt DC, 2.1mm, 300mA min., tip negative power supply (sold separately).
.:.
5" Wide x 4" Deep x 2.4" Tall
STATUS Studio is 3.5" Tall
Road-ready MIDI Machinery™, built in Oregon, USA by Step Audio.
Information contained in this publication regarding device applications and the like is provided only for your convenience and may be superseded by updates. It is your responsibility to ensure that your application meets with your specifications. STEP AUDIO MAKES NO REPRESENTATIONS OR WARRANTIES OF ANY KIND WHETHER EXPRESS OR IMPLIED, WRITTEN OR ORAL, STATUTORY OR OTHERWISE, RELATED TO THE INFORMATION, INCLUDING BUT NOT LIMITED TO ITS CONDITION, QUALITY, PERFORMANCE, MERCHANTABILITY OR FITNESS FOR PURPOSE. Step Audio disclaims all liability arising from this information and its use. No licenses are conveyed, implicitly or otherwise, under any applicable intellectual property rights.
STATUS, Step Audio, and Patented Pedals are all trademarks of Step Audio. info@StepAudio.net
All other pedal names and brands are trademarks of their respective companies which are unrelated to Step Audio.